1stwebdesigner |
- Aim High! Construct Your SEO Friendly WordPress Site
- Pop Up That Page: 10 Best Optin Plugins for Your WordPress Site
- What’s on the MENU? Color Properties Every Designer Should Know
- Dress Up Your Site: How to Customize WordPress Themes
| Aim High! Construct Your SEO Friendly WordPress Site Posted: 29 Aug 2014 06:00 AM PDT WordPress is one of the easiest to optimize CMS for SEO. Although WordPress sites have the highest possibility of getting ranked on search engines, it doesn’t mean that you should not optimize or work on your SEO friendly WordPress site. If you are like the many users around the world believing that your default installation of WordPress will get your site on the top of the search engine ranking, you believe the wrong thing. Just like the other sites on the Web, you really need to do something to make it SEO-friendly. That being said, it’s not that hard to make your WordPress site SEO-friendly. With a lot of themes, plugins, tricks and conventions on the Web, you can definitely do it in a little amount of time. Whether you are a serious WordPress publisher with specific goal on the Web or just planning to start a blog, this article is for you. This article will be a guide on how you can build your WordPress SEO-friendly site.
I. SEO-Friendly WordPress ThemesHow the site was built have a greater factor on the SEO. When choosing a WordPress theme, it is important to pick an SEO-ready theme. But the how do you know if a Theme is SEO Friendly? “SEO friendly” has been used as a sales term for a long time on the Web; however, if you are not developer or SEO, it is difficult to determine which one is the real SEO-friendly theme. Since the SEO (Search Engine Optimizer) is the one who is responsible for checking the on and off-page SEO, it is really important to let SEO check the theme first before buying it. Of course, it won’t be for free. However, there are WordPress SEO publishers who already reviewed some the best WordPress themes for free. As a matter of fact, they also created a guideline for SEO-friendly theme. You can check SEO Yoast for more details. Genesis Themes
According to Yoast, Genesis Themes are one of the best SEO-friendly themes that you pick from. Genesis WordPress theme framework is being used by some of the known pro-bloggers today, whose sites are ranking well on search engines. Genesis is coded carefully and follows all the schema markups which are essential parts of SEO. You can get the Genesis Framework for $59 or you can choose the Genesis Pro Plus Package for just $399.95, which includes more than 60 SEO-friendly WordPress themes. Check out their site for more information. Some of the SEO Friendly Themes by StudiopressThe following are some of the Genesis Themes by Studiopress that are highly recommended by Yoast. Agency
A professional agency theme with confidence and clarity design. Key Features:
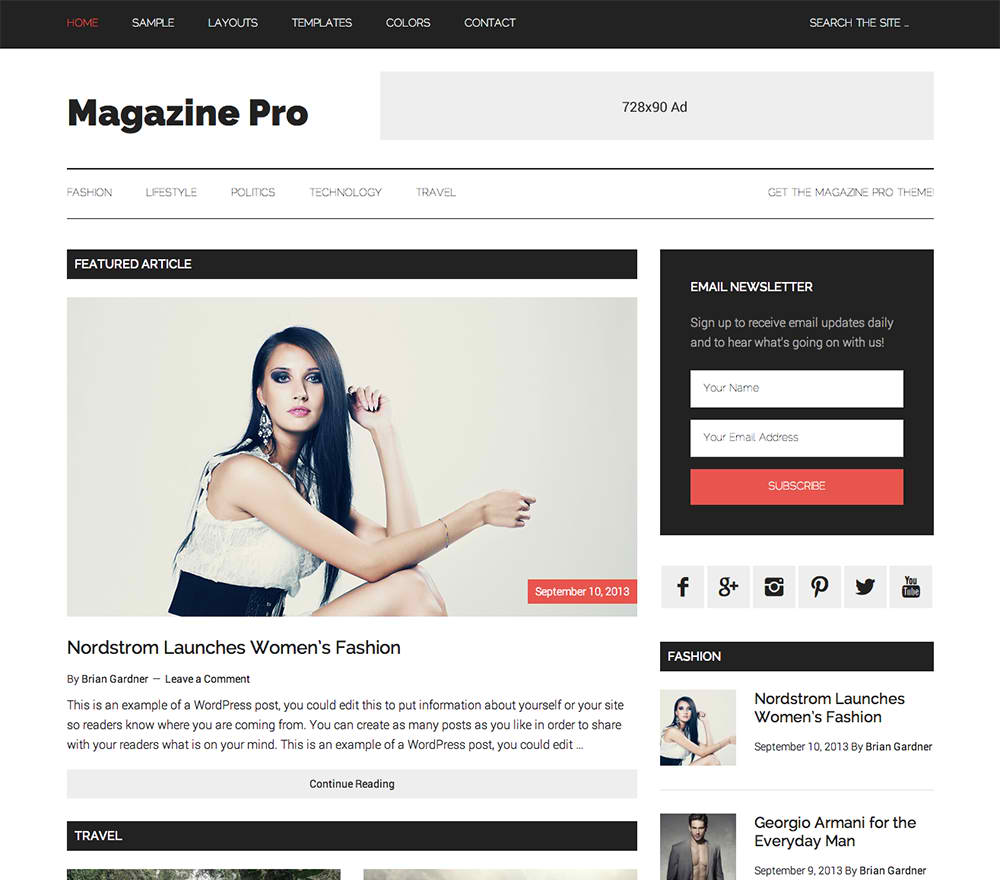
Magazine Pro Theme
A magazine theme for online publishing with the up-to-the-minute, high-gloss look and feel. Key Features:
Winning Agent Theme
With this theme, you can build personal brand and look great in the process. Winning Agent is perfect for showing off your personality, your community and your real estate listings. Key Features:
Tips in Picking an SEO-Friendly WordPress Theme
II. Essential WordPress Plugins for SEOWhen building WordPress sites, the default installation doesn’t come with a complete set of features (SEO, Backup, Google Analytics, etc). WordPress plugins gives additional feature to your site. It will give you more options beyond the “stock” features of the default WordPress installation. Listed below are 7 of the best WordPress Plugins that will help you optimize your site. 1. WordPress SEO by Yoast
This WordPress SEO plugin goes the extra mile to take care of all the technical optimization. It helps you write better content. WordPress SEO forces you to choose a focus keyword when you’re writing your articles, and then makes sure you use that focus keyword everywhere. Key Features:
2. Google Analytics
When you have a website, you want to track how many visitors you have, where they come from, what they do on your site, measure your marketing and much, much more. This plugin can do it for you. Adding Google Analytics to your website will inform you to focus on keywords when you’re writing your articles. It will make sure you use that focus keyword everywhere on your article. Key Features:
3. Broken Link Checker
This plugin will check your posts, comments and other content for broken links and missing images, and notify you if any are found. Key Features:
4. W3 Total Cache
This plugin is designed to improve user experience and page speed. Easy Web Performance Optimization (WPO) using caching: browser, page, object, database, minify and content delivery network support. Key Features:
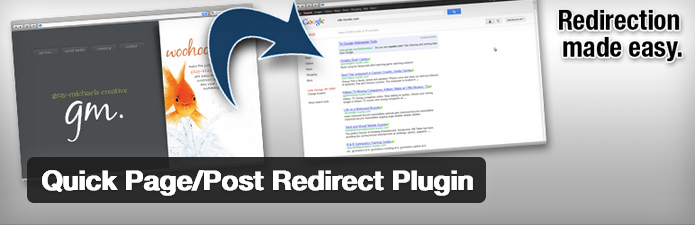
5. Quick Page/Post Redirect Plugin
This plugin adds an option box to the edit section where you can specify the redirect location and type of redirect that you want, temporary, permanent, or meta. Key Features:
6. Google XML Sitemaps
This plugin will generate a special XML sitemap which will help search engines to better index your blog. Key Features:
7. Google XML Sitemap for Videos
This plugin will help you generate Google Video Sitemaps (XML) for your WordPress blog. Key Features:
III. Ways to Make Your WordPress Site SEO-Friendly1. URL StructureHave you notice that default WordPress installation will generate url like this: This url will not make sense to humans nor to search engine web spiders. A URL is meaningful to search engine. Making it readable will make a lot of sense to humans and search engines. A lot of WordPress users forgot to change this on the back-end. There is an option at the back-end under Settings->Permalink. 2. Titles and DescriptionsTitles are important factors of SEO. It tells readers what to expect on the rest of the content. Remember that the description is what search engine users will see once it comes up on the Google, Bing or Yahoo. Always make sure that your title and description inspire users. Also, ensure that this is really the content of your page. 3. Header TagsIt’s also worth mentioning that H1, H2, H3 tags are good to your site’s SEO. By default, the title of your site will be wrapped in an H1 tag. This will inform the search engine robots to its importance to the page. But don’t overdo it. 4. Leverage Internal LinkingInternal linking is necessary because it helps your user to check related articles/posts on your site, thus, increasing traffic on your pages. Anchor tags (links) help Google to determine what your other pages are. A good example for this is Wikipedia. 5. Add Alt Text To All Your ImagesSearch engines can’t see pictures. They utilize the alt content to evaluate what the picture is. This will become handy if you’ll add what is the picture is all about. It will also give more indexes on your page and a chance of getting more visitors will increase. 6. Get the Proper KeywordKeywords are essential part of any SEO campaign in fact these are the words search engine users search for. If you’ve been wondering how you can start finding good keyword, you definitely heard about Google AdWords Keyword Planner where you can:
7. Integrate Social MediaSocial media play a big role on search engines. Google and Bing now give more importance to the authority of the site on social media. Linking your site to different social media like Facebook, Twitter and Google+ will add more value to your site. 8. Write the Proper Content
You might have heard this lot of times already but it will always be true. Search engines love good contents. Websites with good content rank good on search engines. But how to write good contents and what are the factors? Moz created a guide in 4 steps on how to create a good content that you can check on and might find helpful. 9. MaintainSEO is not just a one-time process but a continuous process. As Google changes its algorithm continuously, you must also learn some new things and update your keywords as well. Learning from others is the best way to adapt to the changes. You might wanna follow the people or visit their sites: Final WordsWordPress SEO is not that hard however it is a continuous process. These WordPress tips only scratch the surface. You might find a lot more plugins, themes and tips that can help your site rank well on search engine. If you know some SEO tips you might have to offer to optimize WordPress, please feel free to share it with us on the comment section. |
| Pop Up That Page: 10 Best Optin Plugins for Your WordPress Site Posted: 29 Aug 2014 05:00 AM PDT Whether you are using WordPress for your business or for blogging, you need to get people on your mailing list. But, if you also want to increase the number of readers who sign up to your list, then you need to use optin plugins. In this article, you can find out the 10 best optin plugins you can use for WordPress. Why optin plugins are needed:
1. OptinSkin
OptinSkin allows you to add beautiful optin forms to your blog in multiple locations. You can also split test different variations of optin form to see which one is the best. Features include:
The plugin for a single website is available in US$67. 2. OptinMonster
OptinMonster allows you to create professionally designed optin forms. It enables you to turn your website visitors into subscribers and customers. Features include:
The basic plugin type is available for US$49. Pro version for the plugin costs US$199. 3. Popup Domination
This plugin allows you to increase the number of people who optin to your email list. You can change everything from colors and headers, to image. Features include:
The plugin is available for US$47. 4. Optin Revolution
This plugin allows you to bring visitors to actually join your email newsletter. There is no programming knowledge required for building popup forms. Features include:
The plugin is free to download in lite version. However, the Pro Version for a single site is available in US$47. 5. Ninja Popups
This plugin has beautiful popups to convert your website visitors into subscribers. You can offer a discount for leaving customers, or locking content until they share something. Features include:
The plugin is available for US$18. 6. PopupPress
This plugin is designed to insert any type of content in the popup. It also has a simple system statistics for counting the number of views for popups. Features include:
The plugin is available for US$15. 7. Pippity
Pippity allows you a great level of customization. With ability to handle your popups, the plugin provides an effective way to build the list of email subscribers. Features include:
The plugin for single site is available for US$49. Unlimited sites cost US$165. 8. WPSubscribers
This is an all-in-one plugin for your WordPress site. You can create unlimited number of subscribe forms including the popup forms, each one of having its own content. Features include:
The single license for plugin is available in US$47. 9. Pop Up!
This plugin allows you to grab the attention of your visitor with special offers or ads popups. You can control who sees the popups, including logged-out users. Features include:
The plugin is available for US$19. 10. Multi Events
This plugin allows you to add subscription popup box to your wordppress. Popup window is responsive so it also looks great on small screens. Features include:
The plugin is available in US$14. ConclusionIt can be difficult to decide which one is best because each one packs great features. So, what do you think of these optin plugins? Please share your opinion in the below comment section. I would love to hear it! |
| What’s on the MENU? Color Properties Every Designer Should Know Posted: 29 Aug 2014 04:00 AM PDT For web designers and graphic artists, these color properties are valuable tools for a successful design project.
Appetizer: What is a Color?A color gives emotion to anything. Almost everything in the entire universe consists a lot of enticing and brilliant colors. From a simple stone, food, beverages, underwear, to gadgets, or even as far to your "brownish black" booger. Am I right? It has a color! To see color, you have to have light. When light shines on an object some colors bounce off the object and others are absorbed by it. Our eyes only see the colors that are bounced off or reflected. We understand color just like we understand taste. There are different properties of color to distinguish color as there are different taste attributes that can be found in our taste buds. It is like an analogy. Color:Taste Buds ; Color Property:Taste Entrée: What are the Different Properties?Color plays a big role in our visual encounters. But do you know what are behind these colors? When we look, our eyes register these properties. These are the elements of a color that enhances it. And here they are!
Image from Flickr The 1st Entrée: HueHue has several "food versions", so to speak.
The 2nd Entrée: TintTint is the mixing result of an original color and white. This becomes lighter than the original color. A tint is sometimes called a pastel, any color added with white. For example, a bright blue can result to a sky blue. The effects of tint give a lighter mood and feeling. This is why tints are more appealing to women. You can mostly see billboards and web templates in soft and pale colors if they are marketing beauty products.
The 3rd Entrée: ShadeShade is simply any color mixed with black. This makes the color darker than the original. The same way with making tints, you can mix any pure colors together, then simply add any amount of black, a shade could be created. You can control the amount of shade from an extremely dark to nearly black. Web designers and graphic artists use little amount of black because it can affect the main color. Shades are dark and mysterious which exhibit masculinity. It can be so empowering so be careful of adding too much black. The 4th Entrée: ToneTone is a result of mixing a pure color with any grayscale color doing away the white and black. This means that a certain amount of white and black must have been added to the original color. Tones give a more appealing effect and sophistication to corporate designs and are pleasing to the eye. Tones suits best in most interior design concepts. A tone is softer than the original color, which varies depending on the amount of grayscale color you add. By this definition, all tints and shades are also considered to be tones.
Image from Flickr The 5th Entrée: Saturation Any object changes its appearance during night time and day time. Saturation is concerned with the intensity of the color, how bright or dull the color can be. Saturation aids to know how a color behaves under lighting conditions. The color may be the same, but the saturation changes. A color that is high in intensity – it is bright. On the other hand, saturation is also known as chroma.This property of color tells you how pure a hue is. This means the lack of white, black, or gray in a color will appear very vivid and pure. The 6th Entrée: LightnessLightness can be described as too much shaded to or too much tinted. Changing the lightness value could lighten or darken a color. Adding white will increase lightness and adding black will decrease it. The 7th Entrée: Intensity
Intensity is a synonym for magnitude, degree or strength.This is the brightness or dullness of a color. Less intense colors, like blue, for example, have a soothing effect compared to more intense colors like red. Intense colors are mostly used for highlights and contrast. The 8th Entrée: BrightnessBrightness is a perception which is affected by a color’s lightness. The brightness of a color is more intense if saturation is increased. A higher level of saturation makes a color look brighter. In some cases, brightness is called value. Value is more related to the light and dark properties of color. All colors exhibit these properties. Black, white and gray are values without color. The 9th Entrée: GrayscaleGrayscale is a series of neutral colors, ranging from black to white, or the other way around. A grayscale image contains only shades of gray and no color. Imagine an old vintage television set during the 1970's. The picture is in black and white. Grayscale dumps all colors!
Side Dish: Importance of These Properties
Salad: The Impact of Color Properties to Web Designers and Graphic ArtistsYou need an eye to combine and use color effectively. Color possesses some kind of magnetic power that touches the visual senses. This would be the basis of a win or loss design project.
Remember this:
Color can be a perfect and useful friend for web designers and graphic artists. This brings about a lot of benefits such as:
Designing is like cooking. You need spices to enhance website productivity. Try some of these flavor enhancers.
Dessert: Fun with ColorsA color wheel is a circular arrangement of hues, close to the order of how colors are represented in the light color spectrum. Try this for fun! The experience of actually mixing these yourself will help you understand the subtleties of color much more profoundly. Download the first and third Free Printable Color Wheels to practice on.
Image from Flickr Take OutAfter savoring what is on the menu, I hope your taste for colors have changed and would serve as a big help in understanding how to use them. Share your experience. |
| Dress Up Your Site: How to Customize WordPress Themes Posted: 29 Aug 2014 04:00 AM PDT You’ve already installed your favorite WordPress theme on your site, but you feel that it needs to be tweaked a bit to make it look better, which leads you to ask “How does one customize WordPress Themes?” If you’re new to WordPress, you might think that it is hard to customize a WordPress theme because the thought about the codes scares you. Although customizing a WordPress theme seems like rocket science, there are many simple ways to customize the look and feel of your site without breaking the theme. In fact, there are even some tools on Web that you can use to make the customization process easier and faster. This article serves as a guide to teach you how to modify WordPress Themes the smart and easy way by using a child theme.
Why Use a Child Theme?You might be wondering why you need to use a Child Theme instead of directly customizing the parent theme. Creating a child theme is the safest way to customize a theme. This will make sure that, if you accidentally get some issues on your site while on the process of customizing it, you can simply turn it off. If you want to learn more about child theme, you might want to check this previous article about child themes Customizing a WordPress ThemeOn this part of this article, see how to customize a theme using a Child Theme. For the sake of this tutorial, the built-in NeoBlog WP theme (please free to download it and install it on your WordPress installation) is used as with the previous tutorial about converting HTML and CSS to WordPress. You will focus on the following customization:
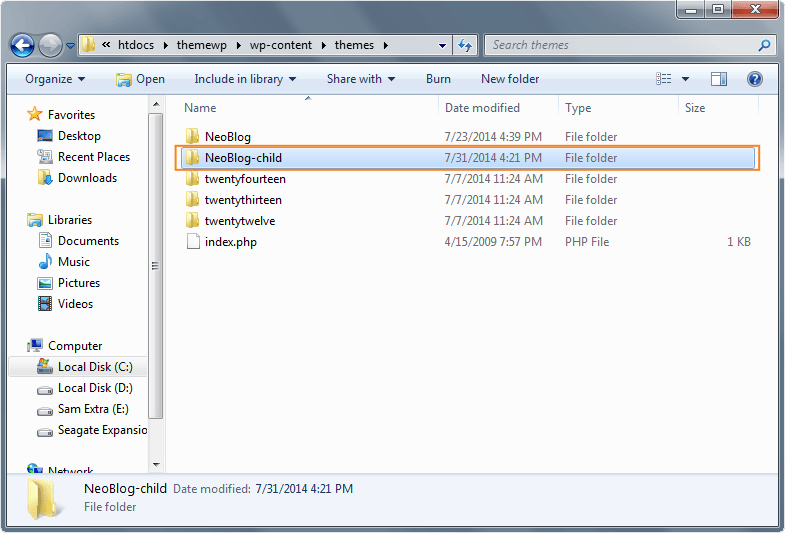
Without any further do, let's get started. STEP 1- Creating a Child Theme FolderTo start off, you need to create our child theme folder. Inside the theme’s folder: wp-content/theme, create a new folder with the word "-child” attached on it.
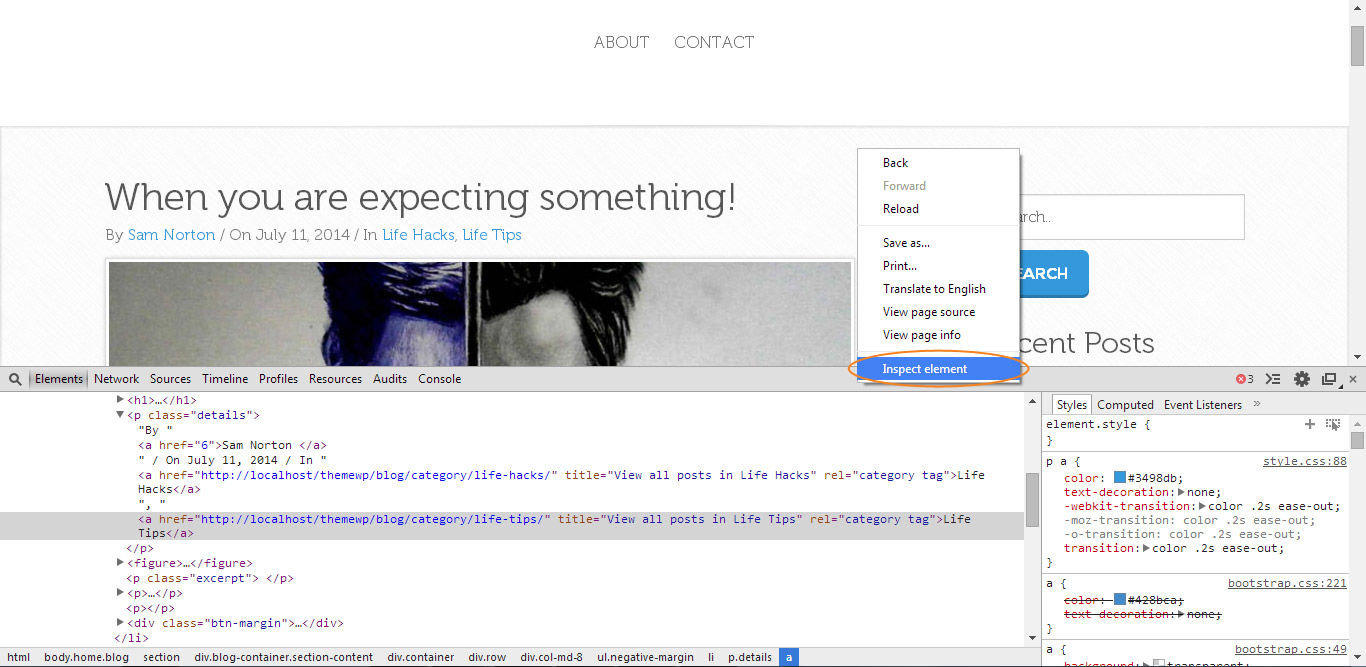
STEP 2- Creating the StylesheetNext, create a style.css file within the "Neoblog-child" theme folder. This file will need some information place into it so that it can be identified as a child theme. Add the following code inside the style.css file. /* Theme Name: NeoBlog Child Theme Theme URI: http://www.1stwebdesigner.com/ Description: NeoBlog Child Theme Author: Sam Norton Author URI: http://www.1stwebdesigner.com/ Template: NeoBlog Version: 1.0.0 */ @import url("../NeoBlog/style.css"); /* =You can start customizing your theme here STEP 3- Using DevToolsOK, the child theme is already created, but how would you know which part of the code to customize? Where can you check which part of the CSS was used on the theme? Believe it or not, web browsers like Google Chrome and Mozilla Firefox has this built-in DevTools that you can use to make changes on your site without any risks. How to use DevTool for ChromeAs mentioned previously, both Google Chrome and Mozilla have this built-in DevTools but for this tutorial, just focus on Google Chrome since it is the most widely used web browser. To turn it on simply Ctrl + Shift + I on Windows OS or Cmd + Opt + I on Mac OS. You can also simply right click and click on inspect elements. Now that you have turned it on, your screen should look this.
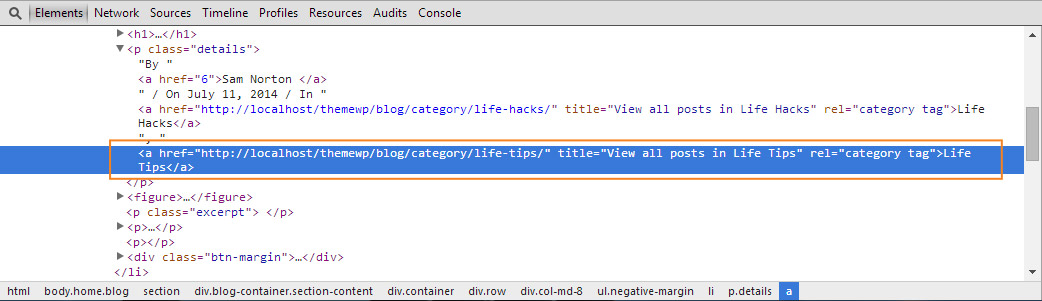
STEP 4- Customizing Link AttributesNow with the Inspector Tool open, start hovering your mouse cursor around the NeoBlog theme front page. Notice that when you click on a particular element or tags, it shows the CSS on the right side. For this part of the tutorial, let’s see how you can customize the color of the links to light green color (hex color: #2ecc71). Go ahead and hover your mouse on the anchor link tags you see on the posts detail.
Notice that on the right side, there it has a style that looks like this: p a { color: #3498db; text-decoration: none; -webkit-transition:color .2s ease-out; -moz-transition:color .2s ease-out; -o-transition:color .2s ease-out; transition:color .2s ease-out; } You don't need to copy all these styles on your style.css inside the NeoBlog-child folder. Since you are just changing the color, copy the color attribute along with its tag. Your CSS would look like this: p a { color: ##2ecc71; } Great! That’s how easy it is to change or modify the color. You can also change other attributes like the font-size, font face and so on. Feel free to navigate on Chrome’s Inspector Tool. STEP 5- Customizing the ButtonsNow that you have successfully customized the links, let’s now see how you can customized the styles of the buttons. Go ahead and navigate on the buttons tag on the Inspector tool. You will notice that the button element comes in an anchor tag with some classes. It was also wrapped in a div class btn-margin. See the code below. <div class="btn-margin"> <a class="btn btn-primary" href= "http://localhost/themewp/blog/2014/07/11/when-you-are-expecting-something/"> CONTINUE READING >>></a> </div> If you are going to hover your mouse on the anchor tag inside the div class btn-margin, you’ll see the CSS on the right side panel of the Inspector tool. You’ll see the style like this. .btn-primary { font-family:'Nexa Bold'; background-color:#3498db; color:#fff; font-size:16px; font-weight:700; height:48px; -webkit-box-shadow:inset 0 -3px 0 0 rgba(0,0,0,0.2); -moz-box-shadow:inset 0 -3px 0 0 rgba(0,0,0,0.2); box-shadow:inset 0 -3px 0 0 rgba(0,0,0,0.2); padding:12px 20px; text-transform:uppercase } Now, if you want to change the color, padding or font, you just need to copy and paste the attribute you want to change. For instance if you want to change the background color your code will look like this: .btn-primary{ background-color: [the color]; } STEP 6- Re-positioning ElementsIf you want to re-position elements, you might need to change the floats of the elements or it might also require some WordPress template tweaking. Let’s say, you want the excerpt to appear above the featured image. Then, you need to copy the index.php file on the parent’s theme folder to the child theme folder you created and change the position of the elements on the actual code. This might be intimidating but not that really hard. You have this code on the original index.php file: <?php get_header(); ?> <!-- BLOG AREA --> <section> <hr class="no-margin" /> <div class="blog-container section-content"> <div class="container"> <?php if (have_posts()) : ?> <div class="row"> <div class="col-md-8"> <ul class="negative-margin"> <li> <?php while(have_posts()) : the_post(); ?> <h1><a href="<?php the_permalink(); ?>" class="gray"> <?php the_title(); ?> </a></h1> <p class="details">By <a href="<?php the_author_posts() ?>"><?php the_author(); ?> </a> / On <?php echo get_the_date('F j, Y'); ?> / In <?php the_category(', '); ?></p> <?php if (has_post_thumbnail()) : ?> <figure> <a href="<?php the_permalink(); ?>"><?php the_post_thumbnail('', array('class' => 'opacity-hover box-layer img-responsive')); ?></a> </figure> <p class="excerpt"> <?php the_excerpt(); ?> </p> <div class="btn-margin"> <a href="<?php the_permalink(); ?>" class="btn btn-primary">CONTINUE READING >>> </a> </div> </li> <?php endif; ?> <?php endwhile; ?> </ul> <?php global $wp_query; if ($wp_query->max_num_pages > 1) : ?> <div class="box-layer align-center page-nav"> <ul class="btn"> <li><?php previous_posts_link('<<< Previous Page', $wp_query->max_num_pages); ?></li> <li><?php next_posts_link('Next Page >>>', $wp_query->max_num_pages); ?></li> </ul> </div> <!-- end box --> <?php endif; ?> <?php endif; ?> </div> <aside> <div class="col-md-3 col-md-offset-1 margin-sidebar"> <?php get_sidebar(); ?> </div> </aside> </div> </div> </div> </section> <?php get_footer(); ?> Then you’ll just need to transfer the_excerpt function on the top of the the_post_thumbnail function. Your code would look like this. <?php get_header(); ?> <!-- BLOG AREA --> <section> <hr class="no-margin" /> <div class="blog-container section-content"> <div class="container"> <?php if (have_posts()) : ?> <div class="row"> <div class="col-md-8"> <ul class="negative-margin"> <li> <?php while(have_posts()) : the_post(); ?> <h1><a href="<?php the_permalink(); ?>" class="gray"> <?php the_title(); ?> </a></h1> <p class="details">By <a href="<?php the_author_posts() ?>"><?php the_author(); ?> </a> / On <?php echo get_the_date('F j, Y'); ?> / In <?php the_category(', '); ?></p> <p class="excerpt"> <?php the_excerpt(); ?> </p> <?php if (has_post_thumbnail()) : ?> <figure> <a href="<?php the_permalink(); ?>"><?php the_post_thumbnail('', array('class' => 'opacity-hover box-layer img-responsive')); ?></a> </figure> <div class="btn-margin"> <a href="<?php the_permalink(); ?>" class="btn btn-primary">CONTINUE READING >>> </a> </div> </li> <?php endif; ?> <?php endwhile; ?> </ul> <?php global $wp_query; if ($wp_query->max_num_pages > 1) : ?> <div class="box-layer align-center page-nav"> <ul class="btn"> <li><?php previous_posts_link('<<< Previous Page', $wp_query->max_num_pages); ?></li> <li><?php next_posts_link('Next Page >>>', $wp_query->max_num_pages); ?></li> </ul> </div> <!-- end box --> <?php endif; ?> <?php endif; ?> </div> <aside> <div class="col-md-3 col-md-offset-1 margin-sidebar"> <?php get_sidebar(); ?> </div> </aside> </div> </div> </div> </section> <?php get_footer(); ?> Wrapping UpThere are number of ways to customize your themes and some might need a little bit of tweaking on the WordPress templates to suit your needs. Although sometimes the changes you want to make on your theme might require some coding knowledge. If it breaks something, you can simply turn off the child theme. Have you started customizing your theme and have any tips to share? Please feel free to share to us on the comments section. |


| You are subscribed to email updates from 1stwebdesigner To stop receiving these emails, you may unsubscribe now. | Email delivery powered by Google |
| Google Inc., 20 West Kinzie, Chicago IL USA 60610 | |