1stwebdesigner |
| Energize Your Static Website with This WordPress Conversion Tutorial (Part 2) Posted: 30 Sep 2014 06:00 AM PDT Help! That’s the first reaction you might have if you are trying to figure out your WordPress conversion tasks, right? Even if you are just a beginner and not really a web expert, you can definitely create a WordPress theme for as long as you know how WordPress works. If you’ve been using WordPress as your website platform, chances are, you're tired of using generic WordPress themes for your site. You might even think of just doing your own theme to have your preferred styles and features. Customizing Your WordPress siteYou can design your ideal site by creating a mockup in Photoshop and then convert the PSD file to HTML and CSS. Afterwards, you can then convert it to a fully functional WordPress theme.
Designing websites using Photoshop PSD files and then converting it to WordPress themes is one of the easiest shortcuts in web design and development today. It is the most ideal way to provide your client a site with small amount of time and with ease. It is easy-peasy, believe it!This tutorial will help you learn how to convert your HTML and CSS static site to a fully functional WordPress blog theme.
Disclaimer: You need to have a background knowledge about HTML, CSS, JavaScript and PHP. Here Are Your Expected ResultsAt the end of this tutorial, you will learn how to convert your plain HTML and static site to a fully functional WordPress blog theme. This tutorial will give you insight about WordPress blog theme templates which we have stated in the first part of the tutorial. This tutorial will encourage you to apply the following coding standards to your WordPress theme:
What You Have Learned So FarIn part one of this tutorial we've worked on the following:
If you've been following this tutorial, the WordPress theme was named via style.css and a screenshot was added for the theme to be identifiable at the WordPress admin panel. After doing this, the theme was activated. Really, there are more things to do. Familiarize with the steps covered in the first part of this series to enjoy this second serving for you will be learning things a notch higher. More focus would be on the rest of the WordPress templates that have defined on the first part of this tutorial. OK, without further do, let's finish the remaining templates so that a fully functional WordPress theme can be achieved. What You Should ExpectTo be specific, you will work on the following:
Resources You Need
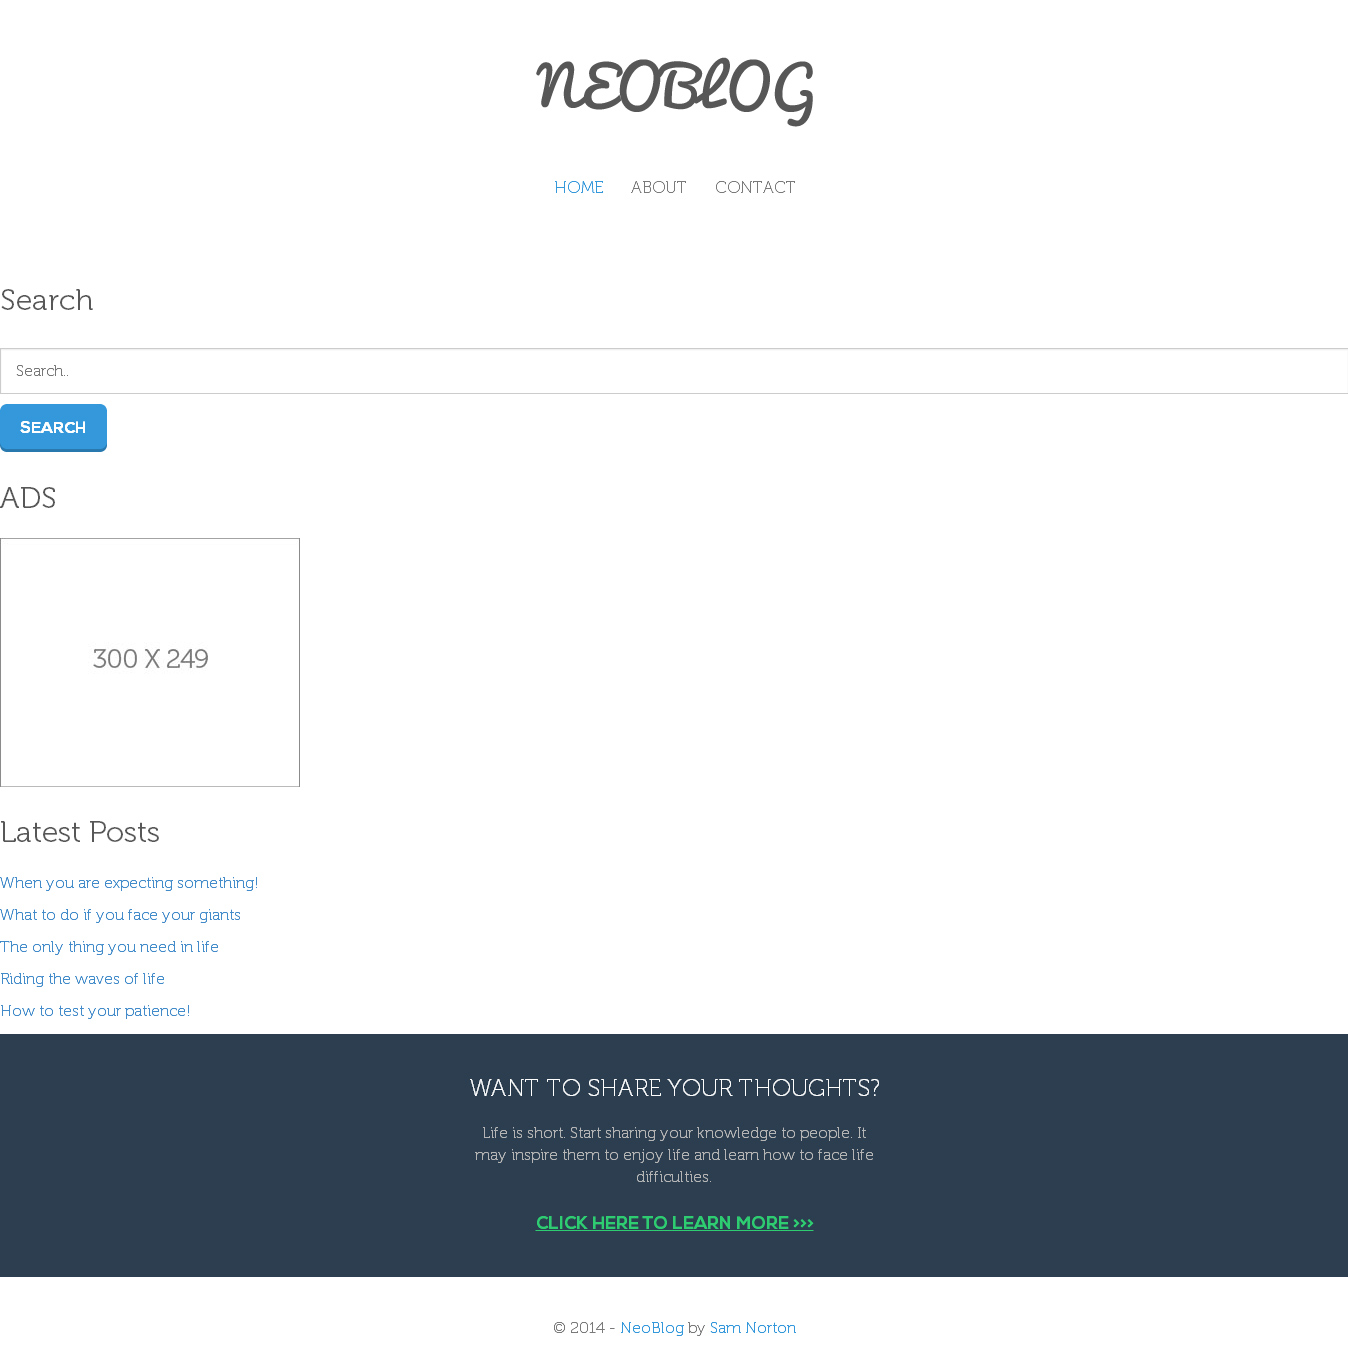
What's the Fuss about This TutorialIn the first part of this series, you were how to prepare your HTML and CSS files for WordPress and then brand and activate the theme. In this last part of the series, you will learn what codes each remaining WordPress template must have to build a working WordPress theme. At the end of this tutorial, you will have the same output just like the demo image file we posted in part 1 of the series. STEP 1 – Defining constants and registering navigation menu supportThe theme is already active! Now add support to the theme directory as well as the navigation menu thru the functions.php. Go ahead and create the functions.php file first on the root directory of the NeoBlog WP theme. Next, define the constants for the theme directory. Go ahead and copy the code below to the functions.php recently created. (Note: Since this is a php file all of the functions and codes relating to php must be enclosed with < ?php ?> tag.) /***********************************************************************************************/ /* Define Constants */ /***********************************************************************************************/ define('THEMEDIR', get_stylesheet_directory_uri()); define('IMG', THEMEDIR.'/images'); You also need to register a function for the navigation menu. Below are the functions needed to make a working navigation. Go ahead and grab it. add_action('init', 'register_my_menus'); function register_my_menus() { register_nav_menus(array( 'main-menu' => 'Main Menu' )); } An add_action hook has been added to register the navigation menu. The first argument is the tag (to which the action will be added later) and the second argument specifies the register_my_menus function to call. To learn more about this, check this page. STEP 2 – Creating header.phpNow, create the header.php file. Open index.html and copy everything from the opening DOCTYPE declaration to the ending tag and then paste it into the header.php file created on the NeoBlog WP theme folder. <!DOCTYPE html> <!--[if IE 8]> <html lang="en" class="ie8"> <![endif]--> <!--[if !IE]><!--> <html lang="en"> <!--<![endif]--> <head> <meta charset="utf-8"> <title>NEOBLOG</title> <meta name="description" content="A simple WordPress blog theme for 1stwebdesigner.com"> <meta name="author" content="Sam Norton"> <!-- Mobile Specific Meta --> <meta name="viewport" content="width=device-width, initial-scale=1, maximum-scale=1"> <!-- Stylesheets --> <link rel="stylesheet" href="css/reset.css" /> <link rel="stylesheet" href="css/bootstrap.css" /> <link rel="stylesheet" href="css/style.css" /> <link href="http://maxcdn.bootstrapcdn.com/font-awesome/4.1.0/css/font-awesome.min.css" rel="stylesheet"> <!--[if lt IE 9]> <script src="http://html5shim.googlecode.com/svn/trunk/html5.js"></script> <![endif]--> </head> <body> <!-- HEADER --> <header class="main-header align-center "> <a href="index.html" class="logo" ><img src="images/logo.png" class="img-responsive" alt="NEOBLOG blog theme" /></a> <nav class="main-nav"> <ul class="inline"> <li><a href="index.html" class="active">Home</a></li> <li><a href="about.html">About</a></li> <li><a href="contact.html">Contact</a></li> </ul> </nav> </header> Some of static HTML tags can be replaced by the WordPress built-in functions such as the language, meta information, body class and so on. Add the wp_head hook before the closing head tag. Use this hook by having the function echo the output to the browser, or by having it perform background tasks. For more information about this, see the WordPress Codex. For the navigation menu, use the wp_nav_menu function to display a navigation menu created in the admin panel of WordPress. The theme_location parameter will display the menu assignment to the location it was set. Otherwise, if it was not set, the parameter fallback_cb will determine what is displayed. To learn more about the wp_nav_menu, check this page. Copy the code below and replace the static html header information just copied. <!DOCTYPE html> <!--[if IE 8]> <html lang="en" class="ie8"> <![endif]--> <!--[if !IE]><!--> <html <?php language_attributes(); ?>> <!--<![endif]--> <head> <meta charset="<?php bloginfo('charset'); ?>"> <title><?php wp_title('|', true, 'right');?><?php bloginfo('name');?></title> <meta name="description" content="<?php bloginfo('description'); ?>"> <meta name="author" content="Sam Norton"> <!-- Mobile Specific Meta --> <meta name="viewport" content="width=device-width, initial-scale=1, maximum-scale=1"> <!-- Stylesheets --> <link rel="stylesheet" href="<?php bloginfo('stylesheet_url'); ?>" /> <link rel="stylesheet" href="css/bootstrap.css" /> <link rel="stylesheet" href="css/style.css" /> <link href="http://maxcdn.bootstrapcdn.com/font-awesome/4.1.0/css/font-awesome.min.css" rel="stylesheet"> <!--[if lt IE 9]> <script src="http://html5shim.googlecode.com/svn/trunk/html5.js"></script> <![endif]--> <?php wp_head(); ?> </head> <body <?php body_class(); ?>> <!-- HEADER --> <header class="main-header align-center "> <a href="<?php echo home_url(); ?>" class="logo" ><img src="<?php print IMG;?>/logo.png" class="img-responsive" alt="<?php bloginfo('name');?>" /></a> <nav class="main-nav"> <?php wp_nav_menu(array( 'theme_location' => 'main-menu', 'container' => '', 'menu_class' => 'inline' )); ?> </nav> </header> STEP 3 – Creating footer.phpFor this part, create the blank footer.php and once again open index.html from the NeoBlog HTML and CSS theme folder. Copy everything from the sharing idea section to footer section. Then paste it to the footer.php file on the NeoBlog WP theme folder. You must have the same HTML codes below. <!-- SHARING IDEAS AREA --> <section> <div class="sharing-container section-content align-center"> <h3>WANT TO SHARE YOUR THOUGHTS?</h3> <p>Life is short. Start sharing your knowledge to people. It may inspire them to enjoy life and learn how to face life difficulties.</p> <h4><a href="contact.html" >CLICK HERE TO LEARN MORE >>></a></h4> </div> </section> <!-- FOOTER --> <footer class="main-footer section-content align-center" id="contact-info"> <p>© 2014 - <a href="http://www.1stwebdesigner.com/" target="_blank">NEOBLOG theme</a> by <a target="_blank" href="https://twitter.com/NickDalusung">Sam Norton</a></p> </footer> </body> </html> Same with header.php file. Again, replace some of these HTML tags to the WordPress built-in functions such as the link to the homepage, the current year and the blog name information. Check out the codes below. <!-- SHARING IDEAS AREA --> <section> <div class="sharing-container section-content align-center"> <h3>WANT TO SHARE YOUR THOUGHTS?</h3> <p>Life is short. Start sharing your knowledge to people. It may inspire them to enjoy life and learn how to face life difficulties.</p> <h4><a href="<?php home_url(); ?>" >CLICK HERE TO LEARN MORE >>></a></h4> </div> </section> <!-- FOOTER --> <footer class="main-footer section-content align-center" id="contact-info"> <p>© <?php echo date('Y'); ?> - <a href="<?php home_url(); ?>"><?php echo bloginfo('name'); ?></a> by <a target="_blank" href="https://twitter.com/NickDalusung">Sam Norton</a></p> </footer> <?php wp_footer(); ?> </body> </html> STEP 4 – Working with searchform.phpNext on the list, add the markup (with built-in WordPress functions), which will display a search box on the sidebar. Go ahead and create searchform.php and copy and paste the code below on it. (Note: Most of the classes you see here came from the search box markup of index.html file) <div class="controller"> <form role="search" method="get" class="search-form" action="<?php echo home_url(); ?>"> <input type='textbox' name="s" class="form-control" id="search-box" value="<?php the_search_query(); ?>" placeholder="Search.."/> <input class="btn btn-primary no-border" type="submit" class="search-submit" value="Search" /> </form> </div> Notice that the the_search_query function as the value of the text box was used. This will simply display the search query for the current request, if a search was made. STEP 5 – Working sidebar.phpBefore creating the sidebar.php, register the sidebar on functions.php file. Go ahead and open functions.php and add the codes below on it. register_sidebar( array( 'id' => 'main-sidebar', 'name' => __( 'Main Sidebar', $text_domain ), 'description' => __( 'This the main sidebar.', $text_domain ), ) ); The codes above will build the definition for a sidebar and returns the ID. Next, let's call the sidebar. Create the sidebar.php file on the root directory of the NeoBlog WP theme and paste the codes below. <?php if ( is_active_sidebar( 'main-sidebar' ) ) : ?> <?php dynamic_sidebar( 'main-sidebar' ); ?> <?php endif; ?> The codes above contain function that calls main-sidebar widget callbacks and prints the markup for the sidebar but, first, it will test if the sidebar is active before proceeding. STEP 6 – Populating the Index FileAfter adding all of these template files, work on the Home Page – the index.php file. Go ahead and create first the index.php on the root directory of the NeoBlog WP theme. <?php get_header(); ?> <?php get_sidebar(); ?> <?php get_footer(); ?> Now, let's now check out the front page of the NeoBlog WP theme and see results.
Notice that the header and the footer are on their proper positions except for the sidebar. To add the contents inside the home page, open the index.html file and copy the blog area section up to the closing div tag of box-layer align-center page-nav class and then paste it just under the get_header function. You'll get similar codes below. <!-- BLOG AREA --> <section> <hr class="no-margin" /> <div class="blog-container section-content"> <div class="container"> <div class="row"> <div class="col-md-8"> <ul class="negative-margin"> <li> <h1><a href="single-blog.html" class="gray">Should I use a Pencil or a Ballpen?</a></h1> <p class="details">By <a href="#">Sam Norton</a> / On July 20, 2014 / <a href="#">Life Hacks</a></p> <figure> <img class="opacity-hover box-layer img-responsive" src="images/thumb1.jpg" alt="Pencil or Ballpen" /> </figure> <p class="excerpt">Lorem ipsum dolor sit amet, consectetur adipisicing elit, sed do eiusmod tempor incididunt ut labore et dolore magna aliqua. Ut enim ad minim veniam, quis nostrud exercitation ullamco laboris nisi ut aliquip ex ea commodo consequat. Duis aute irure dolor in reprehenderit in voluptate velit esse cillum dolore eu fugiat nulla pariatur. Excepteur sint occaecat cupidatat non proident, sunt in culpa qui officia deserunt mollit anim id est laborum..</p> <div class="btn-margin"> <a href="single-blog.html" class="btn btn-primary">CONTINUE READING >>> </a> </div> </li> <li> <h1><a href="single-blog.html" class="gray">How to test your patience!</a></h1> <p class="details">By <a href="#">Sam Norton</a> / On July 20, 2014 / <a href="#">Life Tips</a></p> <figure> <img class="box-layer img-responsive" src="images/thumb2.jpg" alt="Pencil or Ballpen" /> </figure> <p class="excerpt">Lorem ipsum dolor sit amet, consectetur adipisicing elit, sed do eiusmod tempor incididunt ut labore et dolore magna aliqua. Ut enim ad minim veniam, quis nostrud exercitation ullamco laboris nisi ut aliquip ex ea commodo consequat. Duis aute irure dolor in reprehenderit in voluptate velit esse cillum dolore eu fugiat nulla pariatur. Excepteur sint occaecat cupidatat non proident, sunt in culpa qui officia deserunt mollit anim id est laborum..</p> <div class="btn-margin"> <a href="single-blog.html" class="btn btn-primary">CONTINUE READING >>> </a> </div> </li> </ul> <div class="box-layer align-center page-nav"> <ul class="btn"> <li><a href="#">Next Page >>> </a></li> </ul> </div> </div> The codes above will only show a static display of the theme. To make this dynamic, structure the WordPress loop within the markup of the blog area. Copy the code below and replace the blog area just copied from index.html file. <?php get_header(); ?> <!-- BLOG AREA --> <section> <hr class="no-margin" /> <div class="blog-container section-content"> <div class="container"> <?php if (have_posts()) : ?> <div class="row"> <div class="col-md-8"> <ul class="negative-margin"> <li> <?php while(have_posts()) : the_post(); ?> <h1><a href="<?php the_permalink(); ?>" class="gray"><?php the_title(); ?></a></h1> <p class="details">By <a href="<?php the_author_posts() ?>"><?php the_author(); ?> </a> / On <?php echo get_the_date('F j, Y'); ?> / In <?php the_category(', '); ?></p> <?php if (has_post_thumbnail()) : ?> <figure> <a href="<?php the_permalink(); ?>"><?php the_post_thumbnail('', array('class' => 'opacity-hover box-layer img-responsive')); ?></a> </figure> <p class="excerpt"> <?php the_excerpt(); ?> </p> <div class="btn-margin"> <a href="<?php the_permalink(); ?>" class="btn btn-primary">CONTINUE READING >>> </a> </div> </li> <?php endif; ?> <?php endwhile; ?> </ul> <?php global $wp_query; if ($wp_query->max_num_pages > 1) : ?> <div class="box-layer align-center page-nav"> <ul class="btn"> <li><?php previous_posts_link('<<< Previous Page', $wp_query->max_num_pages); ?></li> <li><?php next_posts_link('Next Page >>>', $wp_query->max_num_pages); ?></li> </ul> </div> <!-- end box --> <?php endif; ?> <?php endif; ?> </div> <aside> <div class="col-md-3 col-md-offset-1 margin-sidebar"> <?php get_sidebar(); ?> </div> </aside> </div> </div> </div> </section> <?php get_footer(); ?> The WordPress loop are PHP blocks of code used by WordPress to display posts. Using the loop, WordPress processes each post to be displayed on the current page, and formats it according to how it matches specified criteria within the loop tags. The WP loop usually comes with these blocks of PHP codes: <?php if ( have_posts() ) { while ( have_posts() ) { the_post(); // // Post Content here // } // end while } // end if ?> The codes above is the basic loop along with the markup; however, it has to display the blog information using the following WordPress functions:
With regards to the featured image, use the code the following codes. <?php if (has_post_thumbnail()) : ?> <figure> <a href="<?php the_permalink(); ?>"><?php the_post_thumbnail('', array('class' => 'opacity-hover box-layer img-responsive')); ?></a> </figure> <?php endif; ?> First, test it if there is a featured image set on the WordPress post panel. If the statement is true, it displays the URL of the post and the featured image itself. Notice that an array is added with a class opacity-hover box-layer img-responsive. This is a way of adding a class in the Featured image to make a nice hover, border and box shadow on it. But, doing this won't display the featured image. You need to add functions first to register the featured image. Copy the codes below and paste it into the functions.php. /***********************************************************************************************/ /* Add Theme Support for Post Thumbnails */ /***********************************************************************************************/ if (function_exists('add_theme_support')) { add_theme_support('post-thumbnails'); set_post_thumbnail_size(742, 428); } Great! The featured image will now appear. Next, add function to remove brackets, ellipsis or the hellip word at the end of the excerpt (which is the default display of the excerpt). Open the functions.php and add again the following codes. /***********************************************************************************************/ /* Remove the brackets, ellipsis and hellip on excerpt */ /***********************************************************************************************/ function trim_excerpt($text) { $text = str_replace('[…]', '...', $text); return $text; } add_filter('get_the_excerpt', 'trim_excerpt'); Next, you will tinker the page navigation that was already added on the index.php file. The following code will call the wp_query, a class defined in the WordPress core that deals with the intricacies of a posts (or pages) request to a WordPress blog. It will then set the previous_post_link and next_posts_link function to add a navigation to the blog post list. Check out the code below: <?php global $wp_query; if ($wp_query->max_num_pages > 1) : ?> <div class="box-layer align-center page-nav"> <ul class="btn"> <li><?php previous_posts_link('<<< Previous Page', $wp_query->max_num_pages); ?></li> <li><?php next_posts_link('Next Page >>>', $wp_query->max_num_pages); ?></li> </ul> </div> <!-- end box --> <?php endif; ?> <?php endif; ?> As a final touch, place the get_sidebar function inside the col-md-3 col-md-offset-1 margin-sidebar div along with an HTML5 aside tag to make it float on the right side of the page. Check the code the below. <aside> <div class="col-md-3 col-md-offset-1 margin-sidebar"> <?php get_sidebar(); ?> </div> </aside> As a review, the index.php will contain all of the following PHP codes. Check out the code to avoid missing something. <?php get_header(); ?> <!-- BLOG AREA --> <section> <hr class="no-margin" /> <div class="blog-container section-content"> <div class="container"> <?php if (have_posts()) : ?> <div class="row"> <div class="col-md-8"> <ul class="negative-margin"> <li> <?php while(have_posts()) : the_post(); ?> <h1><a href="<?php the_permalink(); ?>" class="gray"> <?php the_title(); ?> </a></h1> <p class="details">By <a href="<?php the_author_posts() ?>"><?php the_author(); ?> </a> / On <?php echo get_the_date('F j, Y'); ?> / In <?php the_category(', '); ?></p> <?php if (has_post_thumbnail()) : ?> <figure> <a href="<?php the_permalink(); ?>"><?php the_post_thumbnail('', array('class' => 'opacity-hover box-layer img-responsive')); ?></a> </figure> <p class="excerpt"> <?php the_excerpt(); ?> </p> <div class="btn-margin"> <a href="<?php the_permalink(); ?>" class="btn btn-primary">CONTINUE READING >>> </a> </div> </li> <?php endif; ?> <?php endwhile; ?> </ul> <?php global $wp_query; if ($wp_query->max_num_pages > 1) : ?> <div class="box-layer align-center page-nav"> <ul class="btn"> <li><?php previous_posts_link('<<< Previous Page', $wp_query->max_num_pages); ?></li> <li><?php next_posts_link('Next Page >>>', $wp_query->max_num_pages); ?></li> </ul> </div> <!-- end box --> <?php endif; ?> <?php endif; ?> </div> <aside> <div class="col-md-3 col-md-offset-1 margin-sidebar"> <?php get_sidebar(); ?> </div> </aside> </div> </div> </div> </section> <?php get_footer(); ?> STEP 7 – Working with single.phpNow, to display each individual posts in a blog page, create the single.php file and then copy and paste the code below. <?php get_header(); ?> <!-- BLOG AREA --> <section> <hr class="no-margin" /> <?php if (have_posts()) : while(have_posts()) : the_post(); ?> <div class="blog-container section-content"> <div class="container"> <div class="row"> <div class="col-md-8"> <div class="box-layer custom-padding"> <section> <h1><a href="<?php the_permalink(); ?>" class="gray"><?php the_title(); ?></a></h1> <p class="details">By <a href="<?php the_author_posts() ?>"><?php the_author(); ?> </a> / On <?php echo get_the_date('F j, Y'); ?> / In <?php the_category(', '); ?> </p> <?php if (has_post_thumbnail()) : ?> <figure> <a href="<?php the_permalink(); ?>"><?php the_post_thumbnail('', array('class' => 'opacity-hover box-layer img-responsive')); ?></a> </figure> <p class="excerpt"> <?php the_content(); ?> </p> <?php endif; ?> </section> <?php endwhile; ?> <?php endif; ?> <section> <div class="comment-section"> <?php // If comments are open or we have at least one comment, load up the comment template if ( comments_open() || '0' != get_comments_number() ) : comments_template(); endif; ?> </div> </section> </div> <!-- RELATED ARTICLE AREA --> <section> <div class="box-layer related-articles custom-padding"> <h2 class="align-center">Related Articles</h2> <?php $current_categories = get_the_category(); $first_category = $current_categories[0]->term_id; $args = array( 'post_per_page' => 3, 'category__in' => array($first_category), 'post__not_in' => array($post->ID) ); $related_articles = new WP_Query($args); if ($related_articles->have_posts()) : ?> <ul> <?php while ($related_articles->have_posts()) : $related_articles->the_post(); ?> <li class="col-md-4"> <?php if (has_post_thumbnail()) : ?> <figure> <a href="<?php the_permalink(); ?>"><?php the_post_thumbnail('', array('class' => 'opacity-hover box-layer img-responsive')); ?></a> </figure> </figure> <p class="related"><a href="<?php the_permalink(); ?>"><?php the_title(); ?></a></p> <?php endif; ?> </li> <?php endwhile; ?> <div class="clear"></div> </ul> <?php endif; ?> <?php // Restore original Post Data wp_reset_postdata(); ?> </div> </section> </div> <!-- SIDEBAR AREA --> <aside> <div class="col-md-3 col-md-offset-1 margin-sidebar"> <?php get_sidebar(); ?> </div> </aside> </section> <?php get_footer(); ?> There is for the comment section. Check out the codes below. <section> <div class="comment-section"> <?php if ( comments_open() || '0' != get_comments_number() ) : comments_template(); endif; ?> </div> </section> This code will check if comments are open or at least have one comment. It will load up the comment template (more on the comment template later). STEP 8 – Working with page.phpAfter working on the blog page, work on the regular pages. Create the page.php file and then copy and paste the code below. <?php get_header(); ?> <!-- BLOG AREA --> <section> <hr class="no-margin" /> <div class="blog-container section-content"> <div class="container"> <div class="row"> <div class="col-md-8"> <div class="box-layer custom-padding"> <?php if ( have_posts() ) : while ( have_posts() ) : the_post(); ?> <h2> <?php the_title(); ?> </h2> <?php if (has_post_thumbnail()) : ?> <figure> <a href="<?php the_permalink(); ?>"><?php the_post_thumbnail('', array('class' => 'opacity-hover box-layer img-responsive')); ?></a> </figure> <?php endif; ?> <p><?php the_content(); ?> </p> <?php endwhile; endif; //ends the loop ?> </div> </div> <!-- SIDEBAR AREA --> <aside> <div class="col-md-3 col-md-offset-1 margin-sidebar"> <?php get_sidebar(); ?> </div> </aside> </section> <?php get_footer(); ?> Again, there is nothing new to this file except that it doesn’t have the comment section since this is a regular page. In the next 2 files, create 2 WordPress built-in Post Types template. These are pages that display page layout differently. STEP 9 – Working with page-about.phpFor this part of the tutorial, first create a php file and call it page-about.php. Since this page is focused on the details about the website owner, it just contains plain HTML codes along with the header, sidebar and footer. Add a comment at the beginning of the page-about.php file to make sure WordPress will treat the file as a page template. Copy the codes below and paste it to the page-about.php file. <?php /* Template Name: About Page */ ?> <?php get_header(); ?> <!-- BLOG AREA --> <section> <hr class="no-margin" /> <div class="blog-container section-content"> <div class="container"> <div class="row"> <div class="col-md-8"> <div class="box-layer custom-padding"> <img src="<?php print IMG; ?>/my_image.png" class="opacity-hover img-responsive center" alt="my image" /> <div class="align-center"> <h2>About Me</h2> <p>I am a web designer and a front web developer with over 2 years of experience in the industry. Have a passion for designing detailed, creative and modern websites & graphics. I spend most of my time practically every day, experimenting with HTML, CSS and WordPress.<p> <hr/> <h3 class="blue">Feel free to contact me for some Web Projects</h3> <p><i class="fa fa-envelope"></i> Email: [your email] </p> <p><i class="fa fa-twitter"></i> Twitter: [your twitter username] </p> </div> </div> <!-- END RELATED ARTICLE AREA --> </div> <!-- SIDEBAR AREA --> <aside> <div class="col-md-3 col-md-offset-1 margin-sidebar"> <?php get_sidebar(); ?> </div> </aside> </section> <?php get_footer(); ?> STEP 10 – Working with page-contact.phpMany WordPress plugins can add a contact form to the blog, but a plugin is sometimes unnecessary. For the page-contact.php file, add a little bit of PHP and JavaScript codes. First, go ahead and create the page-contact.php file. Now, create a simple contact form. Simply paste the following code on the page-contact.php. <?php /* Template Name: Page Contact */ ?> <?php if(isset($_POST['submitted'])) { if(trim($_POST['contactName']) === '') { $nameError = 'Please enter your name.'; $hasError = true; } else { $name = trim($_POST['contactName']); } if(trim($_POST['email']) === '') { $emailError = 'Please enter your email address.'; $hasError = true; } else if (!preg_match("/^[[:alnum:]][a-z0-9_.-]*@[a-z0-9.-]+.[a-z]{2,4}$/i", trim($_POST['email']))) { $emailError = 'You entered an invalid email address.'; $hasError = true; } else { $email = trim($_POST['email']); } if(trim($_POST['subject']) === '') { $subjectError = 'Please enter a subject.'; $hasError = true; } else { $subject = trim($_POST['subject']); } if(trim($_POST['comments']) === '') { $commentError = 'Please enter a message.'; $hasError = true; } else { if(function_exists('stripslashes')) { $comments = stripslashes(trim($_POST['comments'])); } else { $comments = trim($_POST['comments']); } } if(!isset($hasError)) { $emailTo = get_option('tz_email'); if (!isset($emailTo) || ($emailTo == '') ){ $emailTo = get_option('admin_email'); } $subject = '[PHP Snippets] From '.$name; $body = "Name: $name nnEmail: $email nnComments: $comments"; $headers = 'From: '.$name.' <'.$emailTo.'>' . "rn" . 'Reply-To: ' . $email; wp_mail($emailTo, $subject, $body, $headers); $emailSent = true; } } ?> What has been done here is simply to make sure that the form has been submitted and filed correctly. If an error, such as an empty field or incorrect email address occurrs, a message is returned and the form isn't submitted. Next, create the form and display the error messages below each text box and text area field. <?php get_header(); ?> <section> <hr class="no-margin" /> <div class="blog-container section-content"> <div class="container"> <div class="row"> <div class="col-md-8"> <div class="box-layer custom-padding"> <div id="container"> <div id="content"> <div class="align-center"> <h2>We want to hear from you!</h2> <p>If you are seeking to contact us, please fill up the form below. If you want to advertise or be partner with us just inform us on the message box below. </p> <p>Thank you so much for your support! <br/>We really appreciate!</p> <div class="entry-content"> <?php if(isset($emailSent) && $emailSent == true) { ?> <div class="thanks"> <p>Thanks, your email was sent successfully.</p> </div> <?php } else { ?> <?php the_content(); ?> <?php if(isset($hasError) || isset($captchaError)) { ?> <p class="error">Sorry, an error occured.<p> <?php } ?> <form action="<?php the_permalink(); ?>" id="contactForm" method="post" class="general-form"> <div class="contactform"> <p> <input type="text" name="contactName" class="form-control" id="contactName" placeholder="Your Name.." value="<?php if(isset($_POST['contactName'])) echo $_POST['contactName'];?>" class="required requiredField" /> <?php if($nameError != '') { ?> <span class="error"><?=$nameError;?></span> <?php } ?> </p> <input type="text" name="email" id="email" class="form-control" placeholder="Your Email.." value="<?php if(isset($_POST['email'])) echo $_POST['email'];?>" class="required requiredField email" /> <?php if($emailError != '') { ?> <span class="error"><?=$emailError;?></span> <?php } ?> </p> <p> <input type="text" name="subject" id="subject" class="form-control" placeholder="Your Subject.." value="<?php if(isset($_POST['subject'])) echo $_POST['subject'];?>" class="required requiredField subject" /> <?php if($subjectError != '') { ?> <span class="error"><?=$subjectError;?></span> <?php } ?> </p> <textarea name="comments" id="commentsText" class="form-control" placeholder="Your Message" rows="4" cols="100" class="required requiredField"><?php if(isset($_POST['comments'])) { if(function_exists('stripslashes')) { echo stripslashes($_POST['comments']); } else { echo $_POST['comments']; } } ?></textarea> <?php if($commentError != '') { ?> <span class="error"><?=$commentError;?></span> <?php } ?> </p> <p><input type="submit" class="btn btn-primary no-border" value="Send Message"></input></p> </div> <input type="hidden" name="submitted" id="submitted" value="true" /> </form> <?php } ?> </div><!-- .entry-content --> </div><!-- .post --> </div> </div> </div> <!-- RELATED ARTICLE AREA --> </div> <aside> <!-- SIDEBAR AREA --> <div class="col-md-3 col-md-offset-1 margin-sidebar"> <?php get_sidebar(); ?> </div> </aside> </section> <?php get_footer(); ?> The form is now working but you can enhance it further by adding client side verification. To do this, use jQuery and the validate jQuery plugin. First, download the validate plugin and then place it on the js directory on the NeoBlog WP theme. Add the following links to the header.php file before the closing head tag. <?php if( is_page('contact') ){ ?> <script type="text/javascript" src="<?php bloginfo('template_directory'); ?>/js/jquery.validate.min.js"></script> <script type="text/javascript" src="<?php bloginfo('template_directory'); ?>/js/verif.js"></script> <?php }?> Now, create the verif.js file and put the jQuery code to enable the validation. Here are the codes: $(document).ready(function(){ $("#contactForm").validate(); }); Great! The contact form has just been created. The form will now validate every input and simply picks a form element with class required and verifies if the form is properly filled. Note: Use a plugin if doing the coded above is too difficult. Try Contact Form 7, a very powerful and flexible plugin that adds a contact form to the pages. STEP 11 – Assigning page templates to pagesCool! The page templates have been created. To make them work, assign them to a page. For this part of the tutorial, create first a page from the WordPress admin panel and then assign a page template to it. To do this, go to Pages -> Add New and then give it a title About or Contact.
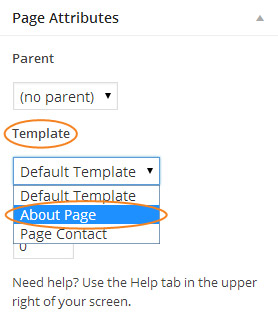
Now to assign a page template to the page, go to the right side panel and look for Page Attributes panel on the right side. Under template, select the preferred template and hit Publish.
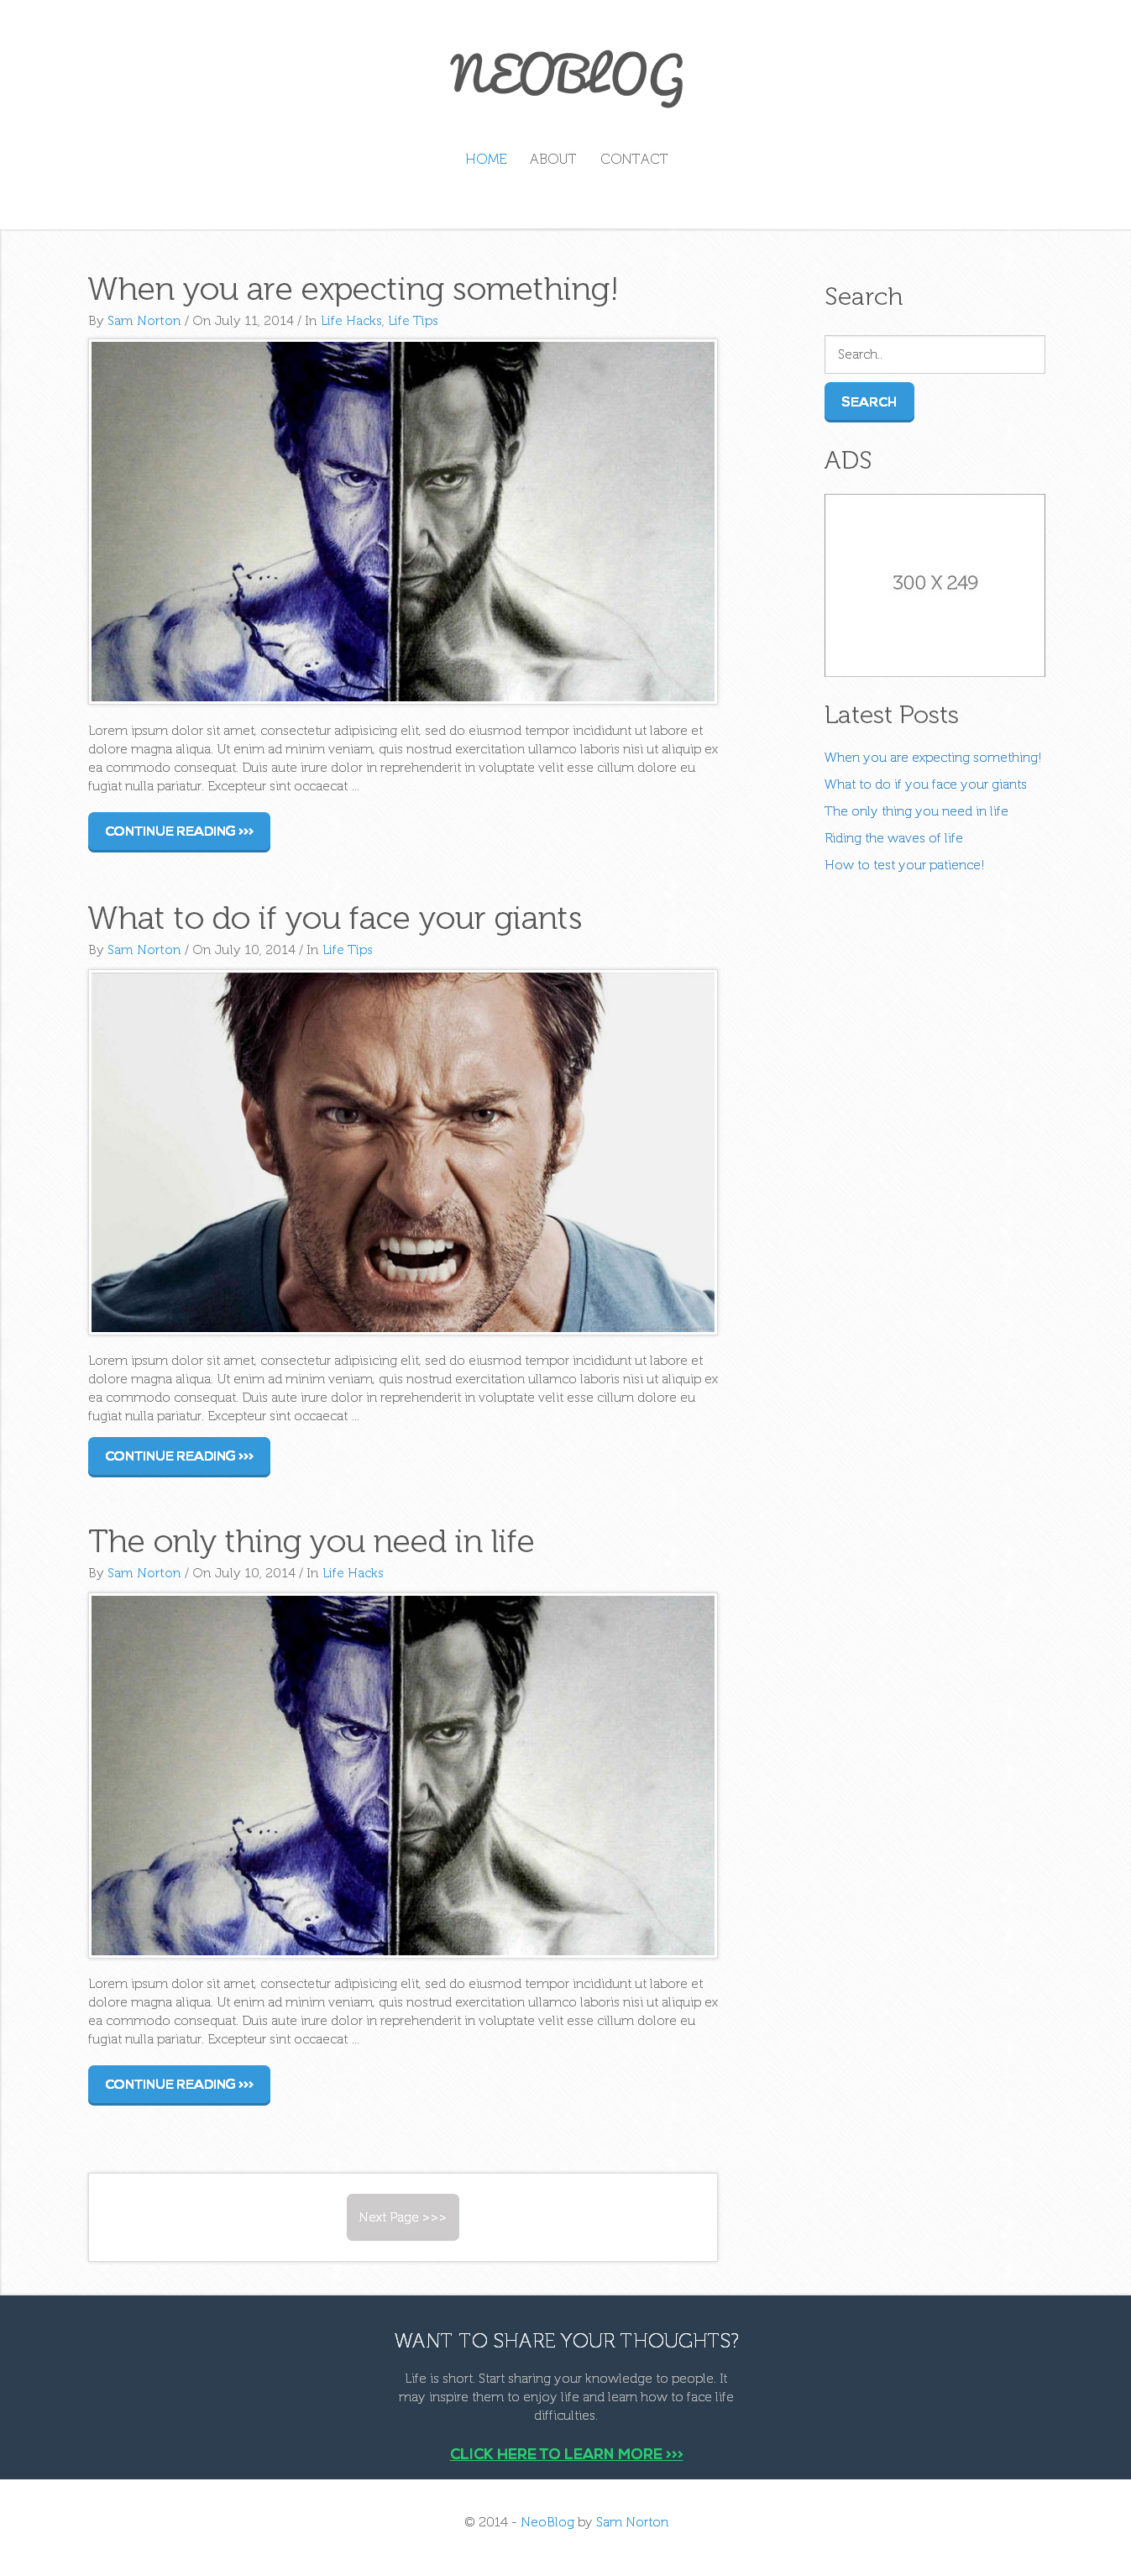
Now you can check the page if it works in the front-end. STEP 12 – Working with search.phpThe structure of the search box is now set up but it is not working yet; it needs some functions to make it work. For this part of the tutorial, add the functionality to enable the search query on the search box. The codes below will have some PHP codes for the search to output the results; otherwise, it will return an error message: "Bummer! No results found", which is wrapped in an H2 tag. Create first the search.php file and grab the following code below on it. Otherwise, if there is a result returned, it will display the result within an H2 tag. Note: The codes below contains HTML tags based on the page.php and single.php <?php get_header(); ?> <section> <hr class="no-margin" /> <div class="blog-container section-content"> <div class="container"> <div class="row"> <div class="col-md-8"> <?php if ( have_posts() ) : ?> <header class="page-header"> <h2 class="page-title"><?php printf( __( 'Search Results for: %s', '_s' ), '<h3>' . get_search_query() . '</h3>' ); ?></h2> </header><!-- .page-header --> <?php /* Start the Loop */ ?> <?php while ( have_posts() ) : the_post(); ?> <?php /*** Run the loop for the search to output the results. */ get_template_part( 'content', 'search' ); ?> <?php endwhile; ?> <?php else : ?> <h2>Bummer! No results found</h2> <?php endif; ?> </div> <div class="col-md-3 col-md-offset-1 margin-sidebar"> <?php get_sidebar(); ?> </div> </div> </div> </div> </section> <?php get_footer(); ?> STEP 13 – Working with content-search.phpThe search.php will control the layout of the search results; however, add the loop of the search to output the results. For this part, create the content-search.php file on the NeoBlog WP theme directory and then paste the code below on it. <div id="post-<?php the_ID(); ?>" <?php post_class(); ?>> <header class="entry-header"> <?php the_title( sprintf( '<h1 class="entry-title"><a href="%s" rel="bookmark">', esc_url( get_permalink() ) ), '</a></h1>' ); ?> <?php if ( 'post' == get_post_type() ) : ?> <div class="entry-meta"> <?php endif; ?> </header> <p class="details">By <a href="<?php the_author_posts() ?>"><?php the_author(); ?> </a> / On <?php echo get_the_date('F j, Y'); ?> / <?php the_category(); ?> </p> <p><?php the_excerpt(); ?></p> </div> STEP 14 – Working with comments.phpTo check again the single.php file, notice that there is a part on that file that contains a div class of comment-section along with some PHP codes. See code below. <div class="comment-section"> <?php if ( comments_open() || '0' != get_comments_number() ) : comments_template(); endif; ?> </div> These codes will simply check if the comments are enabled on the WordPress admin panel using an if statement. If it returns true, it will get the number of comments and simply display all comments returned. Take note these codes alone won't yet display comments, one needs to create the comment_template, using the comments.php file. For this part of the tutorial, go ahead and create this file on the NeoBlog WP theme directory. Now copy the code below and paste it on the created file. <?php /** * The template for displaying comments. * * The area of the page that contains both current comments * and the comment form. * * @package NeoBlog */ /* * If the current post is protected by a password and * the visitor has not yet entered the password we will * return early without loading the comments. */ if ( post_password_required() ) { return; } ?> <div id="comments" class="comments-area"> <?php // You can start editing here -- including this comment! ?> ?php if ( have_comments() ) : ?> <h2 class="comments-title"> <?php printf( _nx( 'One Comment on “%2$s”', '%1$s comment on “%2$s”', get_comments_number(), 'comments title', '_s' ), number_format_i18n( get_comments_number() ), '<h3>' . get_the_title() . '</h3>' ); ?> </h2> <?php if ( get_comment_pages_count() > 1 && get_option( 'page_comments' ) ) : // are there comments to navigate through ?> <nav id="comment-nav-above" class="comment-navigation" role="navigation"> <h1 class="screen-reader-text"><?php _e( 'Comment navigation', '' ); ?></h1> <div class="nav-previous"><?php previous_comments_link( __( '← Older Comments', '_s' ) ); ?></div> <div class="nav-next"><?php next_comments_link( __( 'Newer Comments →', '_s' ) ); ?></div> </nav><!-- #comment-nav-above --> <?php endif; // check for comment navigation ?> <ol class="comment-list"> <?php wp_list_comments( array( 'style' => 'ol', 'short_ping' => true, )); ?> </ol><!-- .comment-list --> <?php if ( get_comment_pages_count() > 1 && get_option( 'page_comments' ) ) : // are there comments to navigate through ?> <nav id="comment-nav-below" class="comment-navigation" role="navigation"> <h1 class="screen-reader-text"><?php _e( 'Comment navigation', '' ); ?></h1> <div class="nav-previous"><?php previous_comments_link( __( '← Older Comments', '_s' ) ); ?></div> <div class="nav-next"><?php next_comments_link( __( 'Newer Comments →', '_s' ) ); ?></div> </nav><!-- #comment-nav-below --> <?php endif; // check for comment navigation ?> <?php endif; // have_comments() ?> <?php // If comments are closed and there are comments, let's leave a little note, shall we? if ( ! comments_open() && '0' != get_comments_number() && post_type_supports( get_post_type(), 'comments' ) ) : ?> <p class="no-comments"><?php _e( 'Comments are closed.', '' ); ?></p> <?php endif; ?> <?php $fields = array( 'author' => '<p class="general-form">'.'<input class="form-control" placeholder="Your Name.." id="author" name="author" type="text" value="' . esc_attr( $commenter['comment_author'] ) . '" size="30"' . $aria_req . ' /></p>', 'email' => '<p class="general-form">'.'<input id="email" class="form-control" placeholder="Your Email.." name="email" type="text" value="' . esc_attr( $commenter['comment_author_email'] ) . '" size="30"' . $aria_req . ' /></p>', 'url' => '<p class="general-form">' . '<input id="url" class="form-control" placeholder="Your Website.." name="url" type="text" value="' . esc_attr( $commenter['comment_author_url'] ) . '" size="30" /></p>' ); $comments_args = array( 'fields' => $fields, 'title_reply'=>'<h2>'.'Leave a Comment'.'<h2>', 'comment_field' => '<p class="general-form"><textarea id="comment" class="form-control" name="comment" rows="4" cols="100" aria-required="true" placeholder="Write your comment here.."></textarea></p>', 'comment_notes_after' => '', 'id_submit' => 'submit-btn' ); ?> <?php comment_form($comments_args); ?> </div><!-- #comments --> There are a lot of things happening on this file. First, it will test if the post needs a password for the user to be able to comment. Next, if it returns true, the comments number and comments will be displayed. Notice that there is also a navigation to see the comments (both previous and next) using the previous_comments_link and next_comments_link function. Finally, use wp_list_comments to display all comments for a post or page based on a variety of parameters, including the ones set in the administration area. Next, add some wp_enqueue_script to check if the threaded comment is enabled. If it returns true, it will enable comment reply. Open up your functions.php and copy the code below on it. if( get_option('thread_comments') ){ wp_enqueue_script('comment-reply'); } STEP 15 – Working with 404.phpCreating a custom 404 page is easy using the 404.php template in a WordPress theme. This will make sure that every link actually goes to a specific web page. If there is a broken link, it will display this page. For this part of the tutorial, create a simple 404 page template. Copy the code below. <?php get_header(); ?> <!-- BLOG AREA --> <section> <hr class="no-margin" /> <div class="blog-container section-content"> <div class="container"> <div class="row"> <div class="col-md-8"> <div class="box-layer custom-padding"> <section> <h2> Oh Snap! Page not found!</h2> <h3> It seems you're looking for something that isn't here!</h3> <p> <a href="<?php echo home_url(); ?>">Click here</a> to go back to homepage! </p> </section> </div> </div> <aside> <!-- SIDEBAR AREA --> <div class="col-md-3 col-md-offset-1 margin-sidebar"> <?php get_sidebar(); ?> </div> </aside> </section> <?php get_footer(); ?> A 404 ‘Not Found’ error page is a page generated by the server to inform a user about non-existing page. On the code above, a simple message error message “Oh Snap! Page not found!” is displayed along with a home link URL. This is making sure that the visitor will stay on the site. The NeoBlog WordPress theme is now complete! Congratulations! Our Final Project
[Download Source]Tips You Ought to Remember for This Part of the Tutorial
What Troubleshooting Techniques You Can UseThere is not really an official rule to check on errors while you are developing a theme. It might be your own codes or some typographical error you just missed on your WordPress templates. However turning on the Debugging mode or checking your error log might help. Before You LeaveYou don't want to read the whole thing? You might wanna try the video version! If you need to know the Part 2 of this tutorial series, you need to watch the whole playlist. Round-upCongratulations! You just converted an HTML and CSS template into WordPress blog theme. That was easy, right? You’ve successfully converted your plain static HTML and CSS NeoBlog theme to a WordPress theme. Now to make it easier for you to follow these steps, we created these video tutorials to make it easier for you to follow the steps on this tutorial by just watching how to do it. Clear ConclusionCongratulations! You just converted an HTML and CSS template into WordPress blog theme on full. That was easy, right? Now you have a fully functional WordPress blog theme that can pull and display content from a database. You can also add more functionalities and styles on it by just browsing the WordPress codex to check all the functions you need. If you have any comments or suggestions, please feel free to drop a line in the comment section. Hope you learned something on this tutorial and see you again next time! |

| You are subscribed to email updates from 1stwebdesigner To stop receiving these emails, you may unsubscribe now. | Email delivery powered by Google |
| Google Inc., 20 West Kinzie, Chicago IL USA 60610 | |


